Step-by-Step Approaches to Getting Flawless Drywall Repair and Installation
Accomplishing perfect drywall fixing and installation requires an organized strategy. It involves understanding the different sorts of drywall and the tools essential for the task. Proper area preparation is crucial prior to beginning any job. Interior Painting. Each action, from covering openings to setting up brand-new sheets, demands interest to information. The procedure does not finish with installment; ending up techniques are crucial for a refined appearance. The following actions will guarantee a seamless outcome, yet exactly what do they involve?
Comprehending Drywall Types and Devices Needed
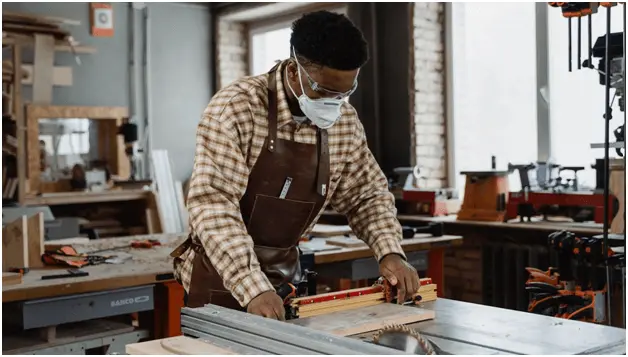
The installation devices are similarly vital. An utility knife is essential for reducing drywall sheets, while a drywall saw can assist in making precise cuts for outlets or components. T-squares assure exact measurements, and drywall screws or nails safeguard the panels to wall studs. Furthermore, a drywall lift can facilitate the setup of huge sheets, decreasing physical strain. Knowledge with these devices and types substantially adds to the effectiveness and top quality of drywall projects.
Preparing the Area for Repair or Setup
Preparing the location for drywall repair or setup is essential to assure a smooth and efficient procedure. The surrounding space ought to be removed of furniture and various other barriers to provide adequate functioning area. This not only ensures security however additionally avoids damage to possessions. Next, it is necessary to cover the floor with decrease towels to catch any debris or dust created throughout the job.
Additionally, the walls ought to be examined for any type of loosened paint or wallpaper that might disrupt adhesion. Eliminating these aspects produces a clean surface for the new drywall. Before beginning, it is a good idea to switch off power to electric outlets or components around. Ensuring appropriate lighting in the office will further boost visibility and emphasis during the fixing or setup process. Interior Painting. By diligently preparing the area, one lays the foundation for a successful drywall task
Step-by-Step Process for Patching Holes

Patching openings in drywall calls for a methodical technique to assure a smooth fixing. The primary step involves assessing the size of the hole. For little holes, a patching substance might be adequate, while bigger holes necessitate a patch. Next off, the broken area should be cleansed and prepared by getting rid of any type of loose particles.
For tiny openings, using spackling compound with a putty knife is suggested, smoothing it over the hole and feathering the edges. Once completely dry, fining sand the area guarantees a smooth coating. For bigger holes, a drywall patch should be reduced to size, positioned over the opening, and secured with screws. After mounting the spot, the exact same spackling process is duplicated, complied with by sanding.
The patched location should be topped and painted to match the surrounding wall surface. This precise procedure ensures a professional look and prolongs the lifespan of the repair service.
Installing New Drywall Sheets: A Comprehensive Overview
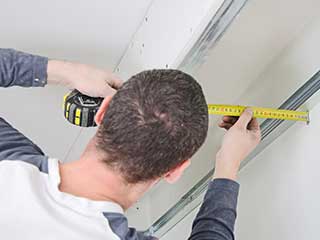
Installing brand-new drywall sheets calls for cautious preparation and execution to guarantee a visually attractive and strong surface. The area must be determined accurately to figure out the number of sheets needed. It is vital to select the appropriate density, normally 1/2-inch for indoor wall surfaces and 5/8-inch for ceilings or fire-rated applications.
Next, the studs or framework must be checked for any type of abnormalities, ensuring they are straightened and appropriately spaced. When placing the drywall sheets, they must be positioned flat to lessen seams and boost architectural stability. A drywall lift can be advantageous for above setups.
Attaching the sheets with drywall screws at suitable intervals makes specific a safe and secure setup. It is necessary to countersink the screws somewhat below the surface to plan for the completing procedure. Complying with these standards will certainly lead to a solid structure, ready for the next actions in drywall ending up.
Finishing Touches: Taping, Mudding, and Sanding Methods
When the drywall sheets are firmly attached, the emphasis moves to the complements that will offer a sleek look. This procedure begins with taping, utilizing either paper or fiberglass fit together tape to cover the joints in between sheets. The tape guarantees a smooth shift, minimizing the threat of fracturing. Following here taping, mudding is crucial; a joint compound is applied over the tape to load voids and produce a seamless surface. Generally, several coats are necessary, every one feathered out further than the before reduce presence.
After sufficient drying out time, sanding is the last action in achieving a remarkable surface. A fine-grit sandpaper is made use of to smooth the dried out compound, ensuring there are no bumps or flaws. Focus to detail during this phase is significant, as it significantly influences the total appearance of the wall surface. The end outcome must be an even, professional-looking surface ready for priming and paint.
Frequently Asked Inquiries
How Do I Pick the Right Drywall Thickness for My Task?
To choose the ideal drywall thickness, take into consideration the job's function, area, and architectural needs. Requirement densities consist of 1/2-inch for basic use and 5/8-inch for fire-rated applications, guaranteeing longevity and conformity with building ordinance.
Can I Set Up Drywall Over Existing Drywall?
Yes, installing drywall over existing drywall is feasible. It is essential to ensure the underlying surface is safe and secure and complimentary from damages. Proper attachment and consideration of thickness are essential for an effective setup.
What Are the very best Practices for Drywall Disposal?
The most effective practices for drywall disposal include reusing when possible, making use of regional waste management solutions, and following guidelines for hazardous materials if relevant. drywall contractors. Appropriately sealing and identifying waste warranties compliance and security throughout disposal
The length of time Should I Wait for Mud to Dry Prior To Fining sand?
Usually, one must wait 24 hr for drywall mud to dry prior to fining sand. Drying out time can differ based on humidity and temperature level, so inspecting for a firm appearance is recommended before continuing.
Are There Eco-Friendly Drywall Options Available?
Yes, eco-friendly drywall alternatives are offered. These alternatives usually use recycled products, low-VOC adhesives, and sustainable manufacturing techniques, reducing ecological impact while giving efficient insulation and durability for numerous construction and renovation jobs.
An energy knife is essential for cutting drywall sheets, while a drywall saw can aid in making accurate cuts for components or outlets. Preparing the area for drywall fixing or setup is essential to ensure a efficient and smooth procedure. Covering holes in drywall needs a systematic technique to assure a seamless repair service. Installing new drywall sheets calls for careful planning and implementation to assure a visually enticing and sturdy surface. Yes, mounting drywall over existing drywall is possible.